Overclocking the CPU increases the overall performance of our computers. Of course, there’s always a side effect of overclocking – increased heat output generated by the CPU. A good CPU cooler is becoming just as important as the CPU itself.
When you think of CPU cooling on air, many will say it’s not all that great. This is why we have forms of cooling better than air/passive, like water cooling, TEC, Phase, DICE, LN2 and so forth. However, choosing one of the latter can be rather expensive. So what you need is the best value for money that air cooling can give you.
Of course you can buy the “all in one” water-cooling solutions from the likes of CoolIT & Corsair for a decent price of approx £50-60. The problem is that although they are good and effective, a top of the line CPU air cooler like some we are reviewing today may beat them and defeats the purpose of going water-cooling. If you want to water cool your CPU, you’re better off doing it right and having a custom built setup instead. You can’t go cheap on water-cooling. A custom low cost water cooling loop is featured in the review.
The Heatsinks
Meet today’s contenders. The Mega Shadow from Prolimatech is considered by many on the enthusiast scene to be the best air cooler on the market. Coming in at approx £60, it’s quite expensive for an air CPU cooler. When you consider the fact you need to buy a decent fan for it, we’re talking £70.
Our two other coolers featured today include Thermalright’s successor to their previous king (the Thermalright Ultra 120 Extreme, or TRUE); the Venomous X. Priced around £47, it could be something special. 47 aluminum fins, six heatpipes and a pressure mounting system. What more do you want?
Last, we have Noctua. We all know and love their quiet cooling solutions giving us the best airflow to noise ratio, but this time we see Noctua surprise us a little with one beastly looking cooler; the NH-D14. 6 heatpipes, dual radiator design, support for all current platforms right out of the box (no more buying that mounting kit you need, mainly AM3, that they don’t supply) 2 fans included‚ 1x 120mm and 1x 140mm. This baby comes in at a jaw dropping £70. However, given the price of the Mega Shadow which doesn’t include 2 fans, let alone 1, or even an AM2/AM3 kit included, Noctua priced it about right. Will the design work? Keep on reading.
Thermalright Venomous X
The Venomous X just supports Intel LGA775/1156/1366 processors out of the box, which means if you’re using AM2/AM2+/AM3 processors, you’ll need to buy the mounting kit separately. The packaging looks great and classy. It seems Thermalright has done away with the old idea of their plain cardboard boxes here.
This cooler is the replacement for the widely praised, loved and respected TRUE. Once the enthusiast weapon of choice when air cooling. When the Megahalems was born and stole the cooling crown from Thermalright, they needed something new.
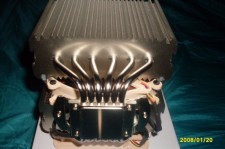
The cooler features special bent wings on the edges of the cooler. Thermalright believe that this system can allow hot air to pass more rapidly than the TRUE once did. As mentioned, the Venomous X features 6 nickel plated heatpipes for ultimate heat dispersion.
What’s great about the mounting kit is it’s very solid and looks polished. They included a pressure mounting system which is placed over the base to mount, and a pressure level knob from 40-70lbs can be exerted onto the CPU for better heat transfer. As this reviewer can’t mount the Intel bracket, I can’t comment on its effectiveness, but fitting it all together away from the cooler, it’s a very solid piece of hardware. No need to swap around kits moving to different platforms and losing parts as the Intel kit supports all 3 of the latest sockets. All you have to do is move the sliders of the backplate in place and tighten the thumb screws in for that particular socket, then apply the pressure you want. A nice design. Well done Thermalright.
Those of you familiar with the TRUE will know all too well the issues it had. One of which was not having a flat base. Whether or not this was intentional on the part of Thermalright, we shall never know for sure as they insist on not having their cooler’s base lapped even if convex (lapping is the process of sanding down the cooler’s base for a smooth flat base for better contact with the CPU, thus better heat dispersion).
Most TRUE owners unluckily bought one with a poor, uneven base and had to lap it so it was flat to get better performance. Unfortunately, doing so meant that pressure was lost since you are effectively making the cooler’s contact with the CPU less effective as the mounting kit supplied would only go so far. In order to improve contact, many would use a copper washer to slip on top of the TRUE’s base but under the mounting bracket to gain the pressure back (and then some). Perhaps Thermalright has finally learned their lesson and came up with a system to combat this. Props to them.
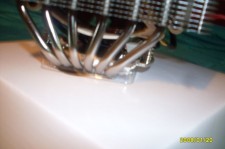
As you can see, Thermalright has done a stunning job on the base of this cooler. We’ve never seen such a stock manufactured shiny base like this before. We can also confirm that this time the base is flatter than the TRUE.
This pressure mounting system is not compatible with the AM2/AM3 kit unfortunately. That said, mounting the cooler using the AM3 kit was 100% rock stable and wasn’t going to budge, even with 3mm free left to spare on the screws from the backplate. What’s great for AMD users is the problem of mounting a cooler in the wrong direction goes away here as the cooler can be mounted in both horizontal & vertical orientations with the (not included) AMD retention bracket.
Installing, however, was another story. Put your Tesco screwdriver kit aside as you won’t need them for this job. Thermalright supply a spanner which you will need. It’s a fiddly job but once it’s in place, it is not going anywhere. It took a good 10-15 minutes to install onto the motherboard. It was quite a pain to install even after a few attempts getting used to it. If you have shaky hands, god help you!
Also included is a tube of Chill Factor 2 TIM, 4 fan clips for a push/pull configuration of fans, 4 vibration dampers and a spanner for the Intel mounting (that you will need) . We can confirm that the fan clips support 120x38mm fans too.
Prolimatech Mega Shadow
What can be said that hasn’t already been said across the interwebs? This cooler currently touted as the best air CPU cooler on the market. It took the crown off Thermalright’s TRUE and is the choice of many enthusiasts today. This is an upgrade over the original Megahalems. You must ask yourself though – Is this Mega Shadow worth the extra £20 over the original? Some reviews have only seen a 1.C difference in favour of the Mega Shadow. At £20 extra for that difference, some may say isn’t worth it.
*NOTE – The following pictures were taken from Prolimatech’ image gallery due to our pictures being corrupted & the camera failing.
6 huge heatpipes, minimized air resistance between fins optimized for lower RPM fans around 800-1200RPM, wide fins to maximize the best air to surface cooling rate, and heatpipes arranged in a straight line to stop any back draft allowing the air to pass through freely and disperse heat faster. The Mega Shadow is a stunning piece of hardware to behold. The black anodized aluminum is a nice touch and looks great!
The mounting kit is wonderful with regard to AMD. In our opinion, it’s better than the Thermalright’s. It feels solid, and you know you’re getting the best contact possible on the CPU. Like Thermalright, it can be mounted in both horizontal and vertical orientations. However, unlike Thermalright’s kit, this kit took all of two minutes to install. Such an easy but strong design. Bear in mind, even with all this praise, Prolimatech doesn’t provide AMD users with it out of the box. It ships with Intel 775/1156/1366 only.
The base of this cooler is great. Flat and shiny. Not quite as good as the Venomous X in terms of how shiny it is, but still very smooth.
Out of the box you get a nice accessory kit full of all Intel mounting that’s separated for easy use in bags. Like Thermalright, they have used a similar design with regard to mounting the heatsink for each Intel platform.
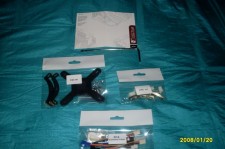
A detailed manual on how to install the cooler in 4 different languages is provided, some PK-1 TIM, and 4 fan clips for push/pull configuration of 2 fans. Note, the fan clips don’t support 120x38mm fans (unlike the Venomous X).
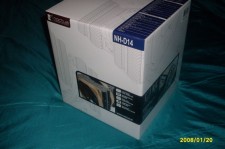
Noctua NH-D14
If someone asked you what’s the first thing that comes to your mind when you think of Noctua, many would say (other than expensive!) quiet cooling. It’s rather surprising that Noctua has released a cooler that looks like the dogs bollocks, but not just any dog, a dog with a serious rage temperament with a pair bulls bollocks! Looking at it, you know it’s going to be a cooling beast and reminds this reviewer of Thermalright’s IFX-14, another top cooler rather overshadowed by the TRUE. You know once an enthusiast gets a hold of one, he/she will remove both Noctua fans and strap 3 high performance fans on there for the ultimate cooling solution for air.
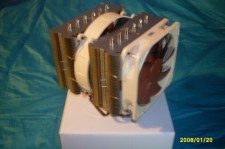
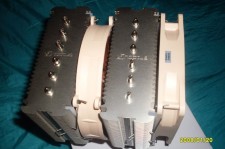
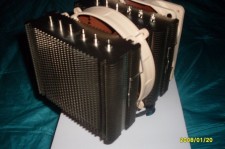
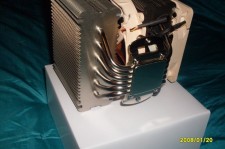
The NH-D14 makes use of the tower design, but instead of a single tower, it has two large fin arrays interconnected with a total of six heatpipes to increase the cooling performance.
Instead of two fans of the same dimension, you get a single 120mm NF-P12 and a single (new) 140mm NF-P14 FLX used in a push/pull configuration. This thing is huge. The pictures don’t do it justice! It measure 160mm tall and 140mm wide. So be aware when installing into your case.
What’s great is that the cooler is pre-assembled with the fans in place for anyone new to the game of CPU Cooling, and comes ready with the mounting brackets for the new SecuFirm2 mounting kit already installed on the heatsink, thus lessening the install time for you. Noctua follow the same path as Thermalright & Prolimatech with their Intel mounting, but go one better and support AM2/AM3 with it too. A great all in one solution.
Installing the kit was a breeze for AMD. Since half the work is done for you, all you need to do is remove the stock motherboard retention bracket and attach 2 brackets screwed into the backplate. Sit the cooler on top and screw it in with the attachments already installed. Simple, but very effective!
The base on the cooler is smooth. Not to the glossiness standard of the other too coolers, but the base seems flat, which is the most important part.
Out of the big box you get a bag with the AMD components, a bag with the Intel components, and a third bag that includes shared components. What you get in the shared components bag is a tube of Noctua’s finest thermal paste NT-H1, a metal case badge to show your support, screws to mount the fans to your chassis, vibration isolators that accomplish the same function, a Y-harness to connect both fans to a single header and the Low Noise and Ultra Low Noise fan adapters.
What we weren’t expecting was the noise. As most people know, we associate Noctua with how quiet they are, but when we fired the cooler up, it makes quite a bit of noise for a Noctua cooler. That’s not to say it’s loud, just not to common Noctua standards. It’s all down to the 140mm P14 fan in the centre. The noise it makes is the air resistance when the P14 is pushing air through the other end of the cooler. This is a rather minor concern though.
Test Method
As neither the Mega Shadow nor the Venomous X come with a fan, we strapped on a single 120mmx38mm San Ace 9G1212H1011 fan, widely considered one of the best fans on the market due to its under-volting ability (lower RPM) and high static pressure (perfect for heatsinks). This fan can produce up to 99CFM at full speed.
The problem we had with the NH-D14 was that Noctua supply 2 fans with the cooler, both 25mm thick. The issue was if we removed both and placed our San Ace on there, it would defeat the design the Noctua cooler was aiming for. We couldn’t use 2 San Ace fans as that would be rather unfair to the other coolers using 1 San Ace each. We thought about using the stock Noctua fans supplied, but they wouldn’t be able to compete with the superior San Ace fan. Thus we concluded that in order to make sure all our bases were covered, we tested the D14 using different fan setups.
Load testing gives the real indication of performance levels. For this we used OCCT and set each test to run for 30 minutes on each cooler. The maximum temperature was taken from CPUID Monitor. We also took into account RPM levels of the fans. We tested the fans on each cooler for idle and load at its lowest and highest RPM to see the difference in cooling performance (using a fan controller).
Idle testing was taken after an OCCT run had finished. We allowed a cooling off period of 15 minutes for the idle test. The minimum temperature was taken from CPUID Monitor.
We used both a stock and overclocked AMD system with a fresh copy of Windows 7 64Bit Ultimate. The Phenom II 705e chip was not unlocked as doing so would prevent us from monitoring temperatures within the Windows environment.
Cool & Quiet was disabled in the BIOS as well as any other energy saving features. OCZ Freeze was the thermal interface material of choice.
Moreover, we have also included a custom water-cooling loop for a quick comparison to aid in seeing how close the latest top air cooling solutions have come to low cost, decent water-cooling custom built. This kit consists of a Watercool HK Rev 3.0 LT widely considered one of the best CPU water blocks on the market. A single 120mm radiator, the RX120 from XSPC. The XSPC X2O 450, a pump and reservoir combo. This kit (plus tubing, fluid, 120mm fan) will set you back approx £130.
Test System
- AMD Phenom II X3 705e @ stock 2.5Ghz w/ 1.2v & @ OC 4.0Ghz w/ 1.5v
- Gigabyte GA-MA790FXT-UD5P
- Sapphire HD 4670 512MB Ultimate
- 2GB Super Talent Project X @ 1600Mhz 7-6-6-18
- 320GB WD AAKS Caviar Blue
- Corsair VX 450W w/ Sharkoon 1000 “Golf Ball”
- Windows 7 Ultimate 64Bit
The results
All tests were run a minimum of 3 times (each run was followed by a remounting of the heatsink) and only best results are represented.
*Please note. Testing was done out of case. During our test session, the ambient room temperature was kept at 17-18°C.
Analysis
If we take into account the Overclocked Load Test that gives us a real indication of how good a CPU cooler is, we can see clearly that the D14 is on top for the AMD platform. With all coolers using the same San Ace fan (even removing the 140mm centre fan from the D14), the D14 is ahead of the Venomous X by 1°C on high RPM. However, if you see our low RPM results, the Venomous X is 2°C better than the D14, but this will have something to do with the distance the San Ace has to push the air across the long heatsink without the aid of the centre fan.
At low RPM, it seems (even a 38mm thick, high static pressure fan) it can’t transfer cool air to the other tower, thus why Noctua insists on having the 140mm fan in place. We see this backed up when temps drop 6°C when you add the P14 pushing the air across to the other side. That said, when we returned the San Ace to high RPM and keeping the 140mm fan in place, temps were only 1.C better than without the P14 in place.
Our previous king, the Mega Shadow, couldn’t seem to keep up, which was a surprise. Even after 3 re-mounts/testing, it still wasn’t to the standard the other two coolers had set. Perhaps the Mega Shadow isn’t optimized for the AMD platform, just Intel.
When keeping the stock Noctua fans in place, we were very surprised to see the results it produced. Even if the D14 was using the two included fans, it was still 1°C better than the Mega Shadow using the high performance San Ace at full tilt, and 1°C higher than the Venomous X. When we reduced the fan speed using the low noise adapters on the two Noctua fans, temps went no higher than 38°C. Compare that to the Mega Shadow on low RPM hitting 41°C and the Venomous X 1°C higher at 39°C.
Conclusion
We have a new king. The Noctua NH-D14. We weren’t expecting this at all. We expected to see the Venomous X steal the crown for Thermalright once again. Perhaps our perception of Noctua as a top brand representing noise to performance ratio was wrong to start off with. Whatever Noctua has done, they did it well. We were rather pessimistic about taking the stock fans off and using just one (albeit a top 120x38mm) fan, defeating the design Noctua was aiming for. None-the-less, it still beat the other two top coolers.
The question is, would we recommend it? If you want the very best cooler for air, the D14 is king. However, at approx £70 it’s rather expensive. Fair play, it does come with all platform mounting hardware and two top (120mm & 140mm) fans installed. Not to mention both the mounting kit and fans are pre-assembled for your ease and comfort.
The problem is that the Venomous X from Thermalright costs £47 right now. Even with the price of a fan, it puts it at £57 approx. If you refer to our results, it’s only within 1.C of the D14 too. So with that in mind, is it really worth (D14) – a good £15 more? There is no doubt that they have both beaten the previous king to the side, so either cooler would be a great choice, especially considering the Mega Shadow costs roughly £60 and doesn’t include a £10 decent fan.
Awards
Overclockers Tech is happy to recommend the Thermalright Venomous X, which gets not only our Gold Award, but our Editors Choice Award. We gave it a 9.5/10. It’s a great price even factoring a decent fan. It’s within 1°C of the new king of air cooling (the D14), and beating the previous king of cooling, the Mega Shadow from Prolimatech. The things letting it down are its lack of an AMD mounting kit out of the box and the time it takes to install.


The Noctua NH-D14 also receives Gold and 9/10. It comes with two top fans, all platform mounting kits and all pre-assembled. It’s the new king of air, and you can mount three fans for the ultimate solution to air cooling. It misses out on our Editors Choice Award due to its cost. As previously mentioned, the Venomous X, even adding a decent fan, is a good £15 (maybe more) cheaper than the NH-D14 from Noctua. Is it worth up to £20 more for 1°C better temperatures? We don’t think so.

The Mega Shadow was overshadowed today and is given a high Bronze Award. Looking at overclocked load temperatures with one high RPM San Ace, it’s 3°C higher than the D14 and 2°C more than the Venomous X. That’s not to say it isn’t a decent cooler; it is. Comparing it to the other two coolers today, it looks bad, but before they came to the market, it was king and is still a top cooler. Unfortunately, at £60 plus a £10 fan, it weighs in at £70, the same price as the D14 – which isn’t great for Prolimatech. We would advise you to get the standard version at a cheaper £40 which makes it all the more worth it, even with a 1°C higher temperature (if that, looking at other reviews). However, the AMD mounting was the best out of the three – quick, simple and effective. This reviewer has never come across such an easy mounting kit that is also very strong! We give it 7/10.

Questions? Comments? Concerns? Share them all in our forums!
Thanks
We would like to thank Armand from Thermalright, Jakob from Noctua, and Prolimatech for sending the 3 coolers for review! A special mention to Colin at Artic Silver for providing us with some ArctiClean Thermal Material Remover & Thermal Surface Purifier to help obtain better, more accurate results.




 Posted in

